Setting up Jekyll on AWS S3 - Part 1
What is Jekyll?
Using the console
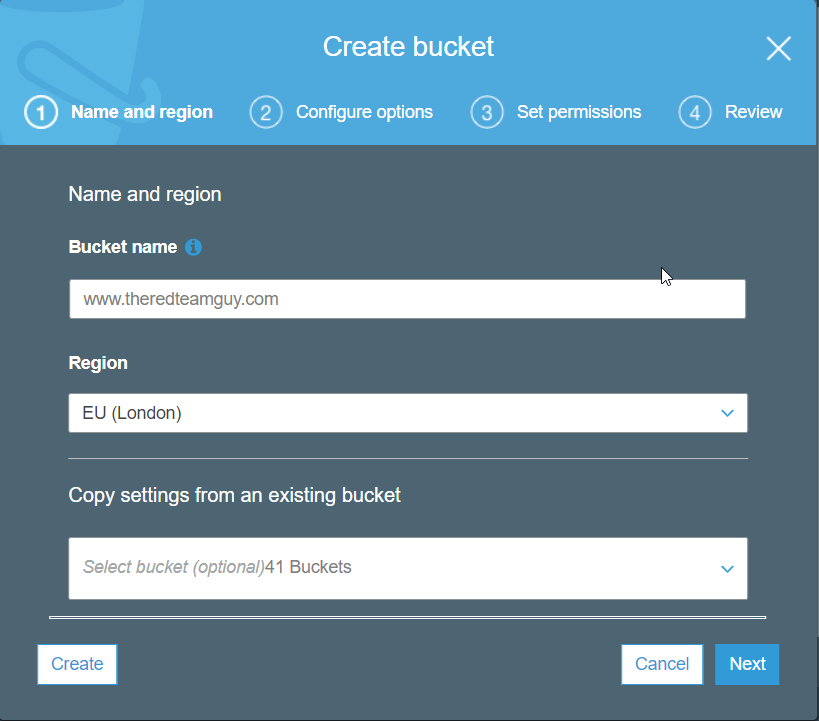
1. Create a bucket
Setting up S3 bucket on AWS is pretty straightforward using the AWS console.
Services » S3 » Create Bucket
Note: If you are using Route53 as your domain registrar. Your bucket name MUST be the FQDN of your intended website URL, otherwise AWS Route53 will not be able to pickup the bucket. I would recommend using it as it will be much easier to integrate your blog with CDN services like Cloudfront and managing SSL certifications will only be a few clicks away.
2. Enabling static web hosting & Setting bucket policy
Properties » Statis website hosting
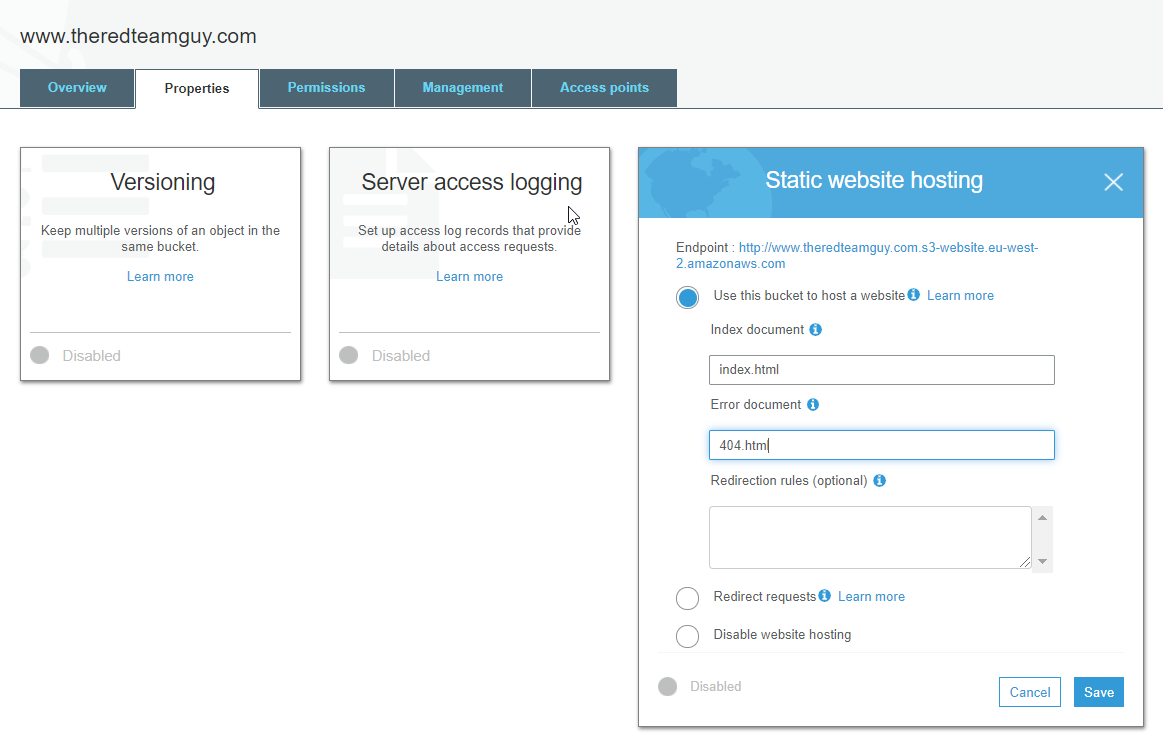
Note: Be sure to change the error document to 404.html as Jekyll by uses that as their default error page.
Permissions » Block all public access
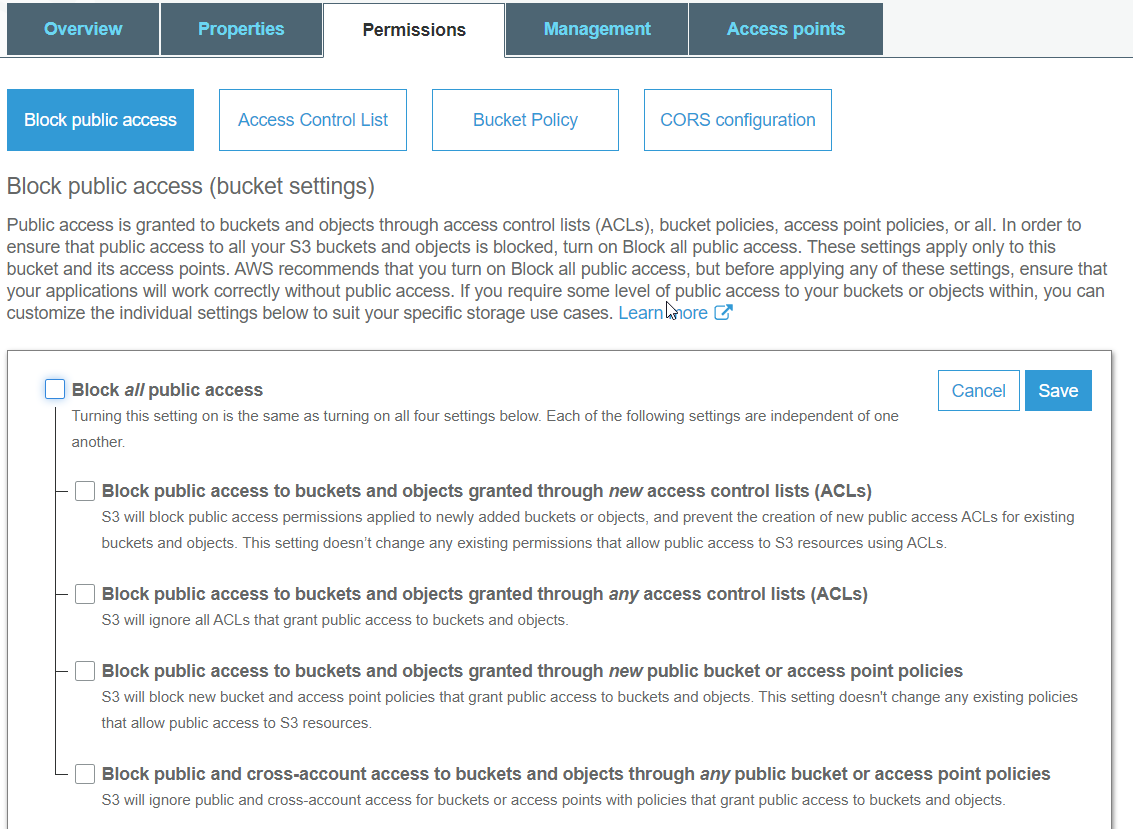
3. Apply public bucket policy
Apply the following bucket policy to enable any resources to read the S3 objects.
{
    "Version": "2012-10-17",
    "Statement": [
        {
            "Sid": "AddPerm",
            "Effect": "Allow",
            "Principal": {
                "AWS": "*"
            },
            "Action": "s3:GetObject",
            "Resource": "arn:aws:s3:::www.theredteamguy.com/*"
        }
    ]
}
Note: Be sure to change the resource parameter to your bucket name. /* is required to access all S3 objects.

